This fractured foundation pieced pouch project is ideal for scrap busting and makes a beautiful gift. It's a great size to use as a make up bag, or toiletry bag to take on holiday. Alternatively you could store sewing tools or stationery in it.

You will need
- Foundation paper
- A selection of scraps
- A fat quarter of fabric for the lining and a fat eighth for the back (or you could do a fractured panel on both sides)
- A 10 inch zip (or larger cut to size which is what I did)
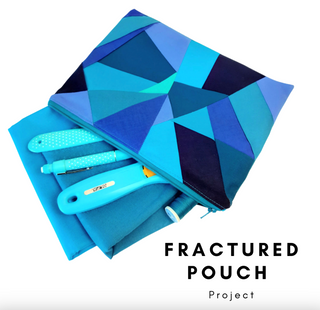
- Fractured Pouch Project
- Optional - interfacing, fusible fleece or wadding to give the pouch more body or allow you to quilt it.
- Sewing clips
- Finished pouch size - 11 x 8 inches
- Seam allowance - 1/4 an inch (you may find our add a quarter ruler helpful for getting accurate seam allowances.)
Cutting
- Back panel - 11.5 inches x 8.5 inches
- Lining - 11.5 x 8.5 inches
- Zip tabs - Cut 2 rectangles 2.5 x 2 inches
- If you are using interfacing or wadding cut 2 pieces 11.5 x 8.5

Foundation Piecing
Use our beginner's guide to foundation piecing and the pattern pieces linked above to piece the front of the pouch. Trim the finished panel to 11.5 x 8.5 and remove the paper from the back.

Assembling the pouch
Fold the zip tabs in half along the 2.5 inch length and press (or finger press) into place.
Place the folded edge about quarter an inch in from the edge of your zip, making sure it's not right on the zip stopper. Sew just inside that folded edge to secure in place.

Put the foundation pieced fractured panel right sides up. Put the zip on top aligning with the top edge with the zip facing right side down. Then place a lining panel on top, aligning with your fractured panel right sides down. Use wonder clips or pins to secure in place and then using a zipper foot sew along the top close to the teeth of the zip.

Fold back the fabrics from the zip so the wrong sides of the fabrics are touching. Press away from the zip (careful not to touch the zip with the iron as it will melt plastic zips) and then top stitch into place.
Now place your back exterior panel right sides up, put the fractured panel on top right sides together and with the other edge of the zip aligning with the top edge of the backing panel. Lastly place the remaining lining panel on top, aligned with the top edge of the zip right sides down.
Clip or pin into place and sew along the top close to the zipper teeth with your zipper foot. Press the fabrics away from the zip and top stitch like you did before.
OPEN YOUR ZIP before the next stage.

Pull both pieces of lining to one side of the zips right sides together, on the other side of the zip you will have your exterior panels right sides together. Use your sewing clips to clip right around the edge, but mark a 4 inch gap in the centre of the lining (I use different coloured clips either side of the gap to remind me to stop sewing.)
Sew right around the outside with a quarter an inch seam, remembering to leave the 4 inch gap in the bottom centre of the lining. Trim the corners by making a diagonal cut just past the edge of the stitching to reduce bulk when you turn through.
Turn the pouch right side out through the gap in the bottom of the lining. Stitch the gap closed by hand or machine then press your pouch to finish.
