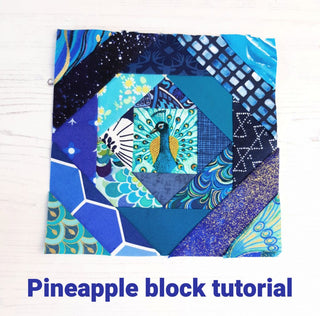
The pineapple quilt block is great for scrap busting, or you can do each square a different colour or alternate light and dark colours for a striking effect. We opted for scrappy. If this is a new skill for you read our beginners guide to foundation paper piecing before you start using our free foundation pieced pineapple block.
Start by printing the block onto our foundation paper, download the Pineapple quilt block template

Check your printer settings to make sure the scale is set to print at 100% to fill the sheet and print to the correct size. There is a 1 inch test square to allow you to check it has printed correctly.

Cut around the edge of the outer square. Fold the paper along the lines, this will make it easier later in the process.

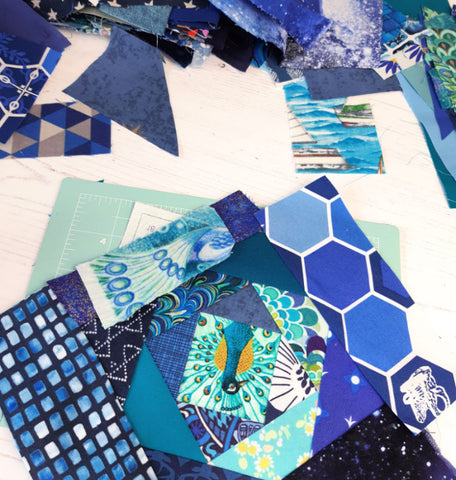
Our foundation paper is semi transparent which makes it really easy to place fabric so you can fussy cut. We decided to use a fussy cut centre for our block. Cut your first piece of fabric so it's at least 1/4 an inch larger than the centre square (labelled 1). Because I'm using small scraps I'm not cutting them down, if you are using other fabric you want to cut roughly to size to avoid fabric wastage.
Note - When paper piecing you place fabric on the back of the paper and sew from the front.

Using fabric glue cover the piece labelled 1 on the back of the paper, place your first piece of fabric on top with the wrong side of the fabric against the glue. Flip the paper over so the fabric is facing downwards, fold the line between piece 1 and piece 2 (if you pre-folded it will fold back easily). Using a ruler trim back any fabric that goes beyond 1/4 of an inch from the edge of the paper. I'm using an add a quarter ruler which is great for paper piecing.

Add your next piece of fabric right sides together with the first fabric aligned with the edge that extends 1/4 an inch beyond the line between 1 and 2. Make sure it's large enough to cover piece 2 entirely even after the seam allowance has been removed.
Note - You want to sew with small stitches when paper piecing so you don't pull the stitches out when you remove the paper. I sew with a stitch length of 1.3.

Take it over to your sewing machine, flip the paper over so the fabrics are facing down. Sew along the line between piece 1 and piece 2. This will join the 2 pieces of fabric.

Fold the second piece of fabric back so it covers piece 2, press into place. You want to press the fabrics into place after every piece you sew.
Fold the line between 1 and 3, repeat the process, trimming, sewing and pressing until you have sewn the whole block.
Trim around the block back to the edge of the paper. You don't need to leave a 1/4 an inch seam allowance here as we added it to the original template.

Tear away the paper from the back of your block and give the block a final press. Now your block is finished.

Why not make the economy block included in our introduction to foundation paper piecing article next? Or we have 10 free 6.5 inch quilt blocks included in our Quilter's Workbook with a free sampler cushion project on our blog.
